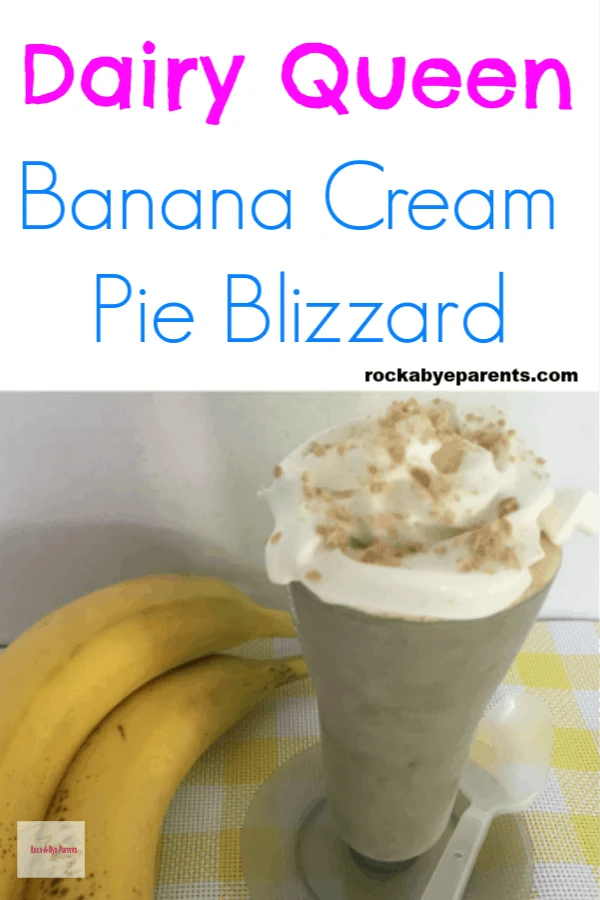
There are times I am amazed by how many different Dairy Queen Blizzard recipes there are. Nowadays there seems to be a flavor for just about everyone. A favorite with banana lovers is the Dairy Queen banana cream pie Blizzard.

Dairy Queen Banana Cream Pie Blizzard
Disclosure: This post contains affiliate links. As an Amazon Associate, I earn from qualifying purchases.
Growing up, when I thought of Blizzard flavors I always thought of candy. An M&M Blizzard was certainly a favorite, and now and then I might have a Snickers Blizzard.
As I got older I started trying a few different Blizzard recipes, but I often stayed with a select few. Which is why I was surprised when I started having people ask me if I had a banana cream pie Blizzard recipe.
I love a good banana cream pie. In fact my egg-free chocolate banana cream pie is one of my favorite desserts, so when I heard that there was a DQ banana cream pie Blizzard I had to try it.
Of course once I had tried the new Blizzard flavor I had to come home and try to copy it. I’m actually very happy about how my version of the banana cream pie Blizzard turned out.
I had to make it a few times to get the ingredient balance right, but it tastes just like a banana cream pie if I do say so myself. Which I do!

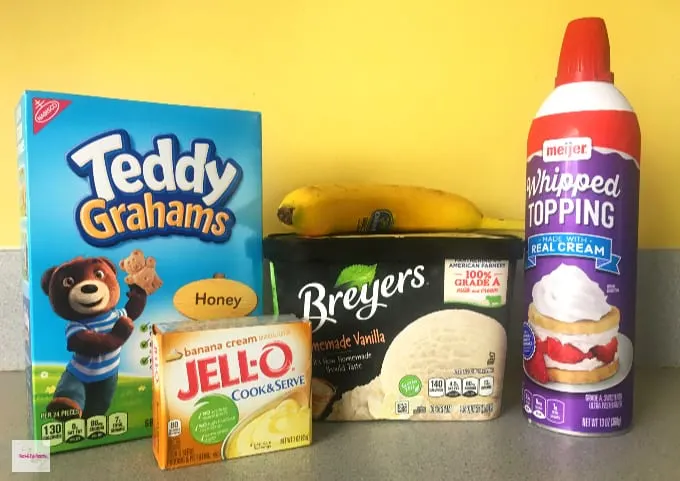
Ingredients Needed for this Dairy Queen Banana Cream Pie Blizzard Recipe
- Vanilla ice cream
- 1/3 of a banana
- 1 Tablespoon of Jell-O Cook & Serve Banana Cream Pie Pudding powder
- 25 Honey Teddy Grahams
- Whipped Topping
Must Have Resources
Making your own banana cream pie Blizzard at home is pretty easy, but there are some items that you will need to make them.
How to Make a DQ Banana Cream Pie Blizzard
While making a DQ banana cream pie Blizzard doesn’t take all that much time the ice cream is going to get pretty soft, and possibly mushy, during all of the steps. That’s normal, and it won’t be like that when it’s ready to eat, but the harder the ice cream still is at the end of creating the Blizzard the less time it will need to reharden before you eat it. For that reason I suggest preparing as many of the ingredients and steps before you get the ice cream out of the freezer as you can.

The first thing I recommend doing is cutting up the actual banana. You’re going to want to add 1/3 of a banana to each individual blizzard. This can change a bit depending on the size of your banana. A medium sized banana is best, or one that is just smaller than that. That way the pieces aren’t too big.
To cut up the banana start by slicing off individual slices onto a plate. Then take the bites and cut them again into quarter sections. Once you’ve cut up 1/3 of the banana set the plate aside.

At this point you’re ready to add the ice cream to your food processor and get to work. The amount of ice cream you need does depend a bit on the ice cream glasses you’re going to put your blizzards in, but 3 good size scoops of ice cream works for most sized glasses.
Once you’ve scooped your ice cream it would be a good idea to turn on your food processor for a short time. Just long enough thicken the ice cream by blending all of the scoops together.

After blending the ice cream scoops you need to add the Jell-O pudding. To do this you need to use a box of cook and serve banana cream Jell-O pudding. All you’re going to do is scoop a tablespoon of the powder and sprinkle it over the ice cream that you placed in the food processor.
Try to spread the powder out so it’s sprinkled all over all of the ice cream and not simply just dumped onto one spot. That way it blends together with the ice cream faster.
Once your powder is all added turn the food processor on to mix the the banana pudding powder with the ice cream. This process usually doesn’t take longer than a few moments.
I find that at this step the ice cream often gets pretty soft and mushy which is why you want to start with it as hard as possible. Don’t worry though because it won’t be like that when it’s time to enjoy your DQ banana cream pie blizzard.

Once the powder and ice cream are relatively mixed open up the food processor and add 20 Teddy Grahams. Then turn the food processor back on until the Teddy Grahams are mostly crushed. Like before you won’t need to run the food processor very long for this part.

Now it’s time to add the banana pieces to the ice cream. To do this I suggest removing the bowl from the food processor base. Then use a spatula to add the banana pieces and gently fold them into the ice cream.

After the banana pieces have been added and folded in use the spatula to help pour the banana pie ice cream into a freezer safe glass. There’s a good chance that at this point the ice cream mixture is pretty much mush, so you might need to wipe any ice cream running down the outside of the glass.
When the ice cream has been poured in, and the glass cleaned up, place the freezer safe glass into your freezer to allow the ice cream to reharden. The amount of time needed for this depends on how soft the ice cream got, how hot it is in your home, and how cold your freezer gets. I recommend having the freezer on the coldest setting possible to speed the process up, but this will likely take a minimum of an hour, and more likely it’ll need an hour and a half.

During the time that the blizzard is in the freezer hardening prepare the graham cracker crumbs. To do this just take the remaining Teddy Graham crackers, place them into a baggie, and gently hit them with a rolling pin until the crumbs are the size you’d like.
Once the banana cream blizzard has had time to harden enough you can remove it from the freezer to enjoy. Although don’t remove it until you’re ready to eat it because it will most likely soften pretty quickly again.

Once you’ve removed the blizzard add whipped topping from a can, and then sprinkle the graham cracker crumbs on top it. Now enjoy your amazing Dairy Queen Banana Cream Pie Blizzard before it melts!
Tips for Making a DQ Banana Cream Blizzard
Making a DQ Banana Cream Blizzard at home isn’t too complicated, although there is a bit more to it than some other blizzard recipes that I have shared. Still it isn’t as hard as one would probably think. To make it even easier though here are a few tips for you.
Due to the real banana pieces in the ice cream, and how soft it gets during the creation process, this blizzard takes a very long time to set and get hard enough to eat. The farther in advance you can make it the better. Plus just know that if it might never fully harden. As long it seems mostly hard it’ll be fine to eat. With this particular recipe I find it has a difficult time getting as hard as I like a blizzard to get no matter how long I give it to sit in the freezer.
My food processor isn’t terribly large, so I find it’s easiest to make one blizzard at a time. With bigger food processors you can make multiple blizzards in one go. Still with this particular recipe I think it’s actually better to make one blizzard at a time so each glass has the right ratio of graham crackers and banana pieces.

More Recipes that use Bananas
I don’t know about you, but we’re big banana fans in this house, so we often have them on hand. Sometimes, especially during warm weather months, that means I also have a lot of overripe bananas that no one wants to eat. While I don’t recommend using overripe bananas in the Dairy Queen Banana Cream Pie Blizzard recipe the recipes below are great ways to use those overripe bananas up!
- Easy Egg-Free Banana Bread
- Peanut Butter Banana Ice Cream Recipe – From 3 Boys and a Dog
Dairy Queen Banana Cream Pie Blizzard

Enjoy a Dairy Queen Banana Cream Pie Blizzard at home any time with this easy to crate copycat recipe!
Ingredients
- 3 Scoops of Vanilla Ice Cream
- 1/3 of Medium Sized Banana
- 1 Tablespoon of Jell-O Cook and Serve Banana Cream Pie Pudding Powder
- 25 Honey Teddy Grahams
- Whipped Topping
Instructions
- Slice up 1/3 of a medium sized banana. Cut off individual slices and then cut each slice quarters.
- Place 3 scoops of vanilla ice cream into a food processor.
- Blend until thick.
- Sprinkle Jell-O banana cream pie pudding powder all over the thickened ice cream.
- Blend again to mix the ice cream and powder together.
- Add 20 Teddy Grahams to the ice cream in the food processor.
- Blend one more time, just long enough to chop up the Teddy Graham pieces to small bite size pieces.
- Remove the bowl from the food processor. Then add the banana pieces to the ice cream and fold them in.
- Pour ice cream in to freezer safe glasses.
Nutrition Information:
Yield:
1 BlizzardServing Size:
1Amount Per Serving: Calories: 2429Total Fat: 36gSaturated Fat: 23gTrans Fat: 0gUnsaturated Fat: 11gCholesterol: 94mgSodium: 661mgCarbohydrates: 551gFiber: 5gSugar: 519gProtein: 14g

Sunday 20th of August 2023
The 1980s version in stores used Nilla Wafers not graham crackers.
Elizabeth
Tuesday 10th of October 2023
Oh, those would work really well too!